April 2025
How to open a Vertex AI Workbench Jupyter notebook in Cursor(VS Code)
Welcome to this guide on how to open a Vertex AI Workbench Jupyter notebook using Cursor, which also works with VS Code. If you're a fan of coding in Cursor like I am, you're in the right place!
Prerequisites
Before we start, make sure you have the following installed on your local machine:
- Cursor (version 0.48.9+) or VSCode (version 1.96.2+)
- gcloud CLI
1. Create a User Managed Notebook
If you already have a Vertex AI Workbench Notebook, feel free to skip this step.
- Go to GCP Workbench and click on
Create new. - Choose your machine type based on your needs (e.g., GPU, memory, cores).
- Set up IAM and security based on what you need to access. Consider using a service account for cross-project access.
2. Add SSH Key to User Managed Notebook
Create SSH key
- Open your terminal and run the following command to create an SSH key:
ssh-keygen -t rsa -f ~/.ssh/jupyter
- Open the public key in a text editor. Change the username at the end to jupyter to ensure access to files created in the UI.

Add ssh key
- Use the gcloud command line tool to add your SSH key:
Example:
gcloud workbench instances update zyrah-notebook --metadata=ssh-keys="jupyter:$(cat ~/.ssh/jupyter.pub)" --location=us-central1-a --project neoval-sandbox
- Disable OS login to allow SSH access:
Example:
gcloud workbench instances update zyrah-notebook --metadata=enable-oslogin=FALSE --location=us-central1-a --project neoval-sandbox
3. Promote address to static
If you plan to use your notebook over a long period, it's a good idea to reserve a static IP address. This prevents the IP from changing every time you restart the instance.
- Go to VPC Network > IP Addresses and select
Promote to static addresson theexternaladdress for your notebook. - Name your IP address. For more details, check this

4. Remote SSH into notebook
-
In Curor, open
New Window -
Click on
Connect via SSH
-
Click on
+ Add New SSH Host... -
Enter your SSH command
Example:
ssh -i /Users/zyrahbernardino/.ssh/jupyter jupyter@<external IP address>
- Will direct you to update
.ssh/configand automatically populate a New Host.

Update the Host label so you can find it later.
Host <whatever you want to label>
  HostName <external ip address>
  IdentityFile /Users/zyrahbernardino/.ssh/jupyter
  User jupyter
- Open
Connect via SSHagain and select the host you labeled.
5. Set up Jupyter
- Open folder
/home/jupyter/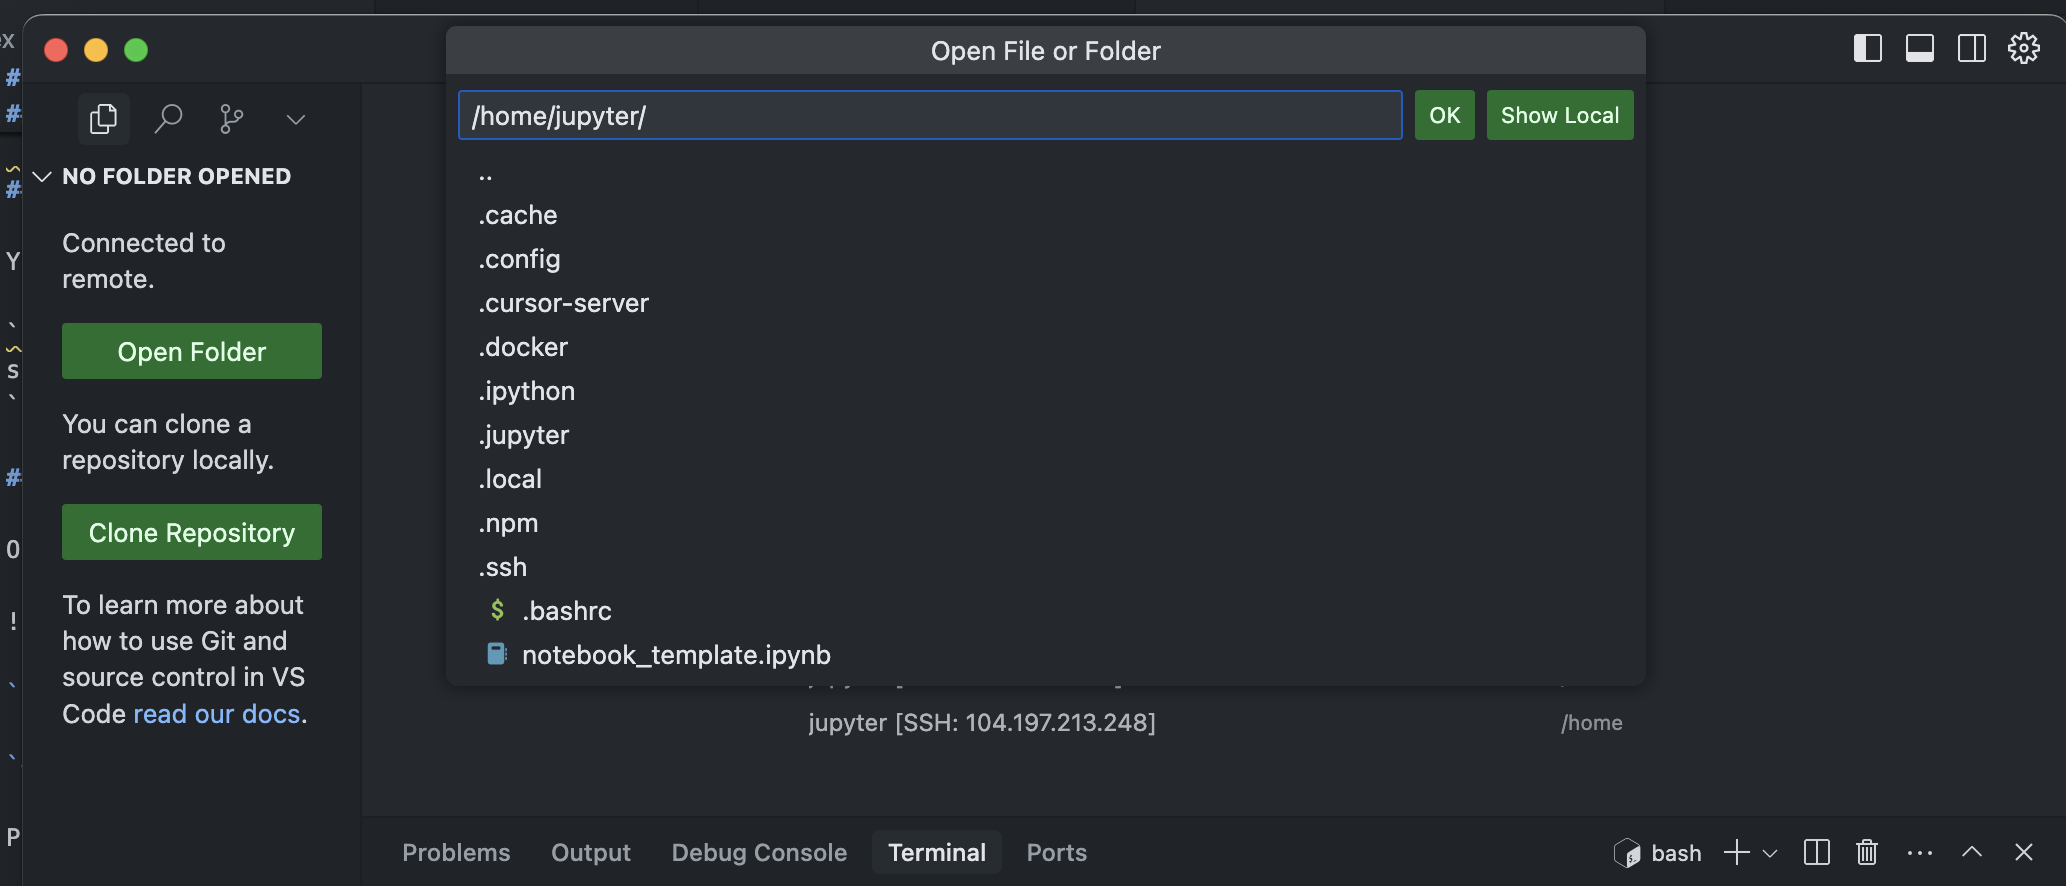
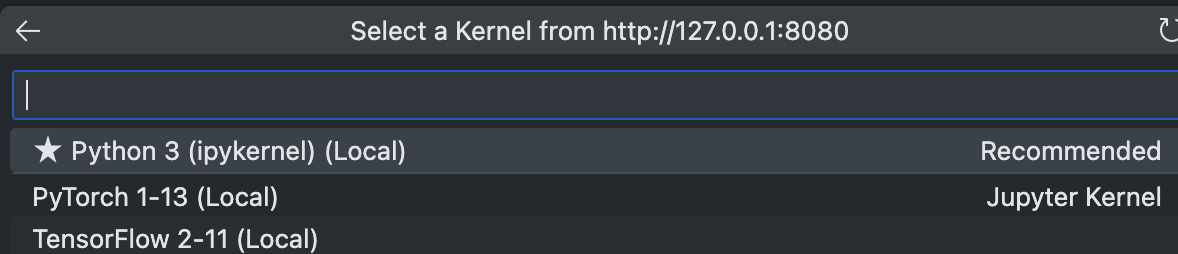
Install extensions
- Click on
Select Kernelin the top right corner. - If Jupyter isn't installed, click on
Install/Enable suggested extensions.
- Once installed, select
Existing Jupyter Server..and enterhttp://127.0.0.1:8080. - Choose your kernel. Workbench notebooks come with pre-installed options like PyTorch or TensorFlow.
Final Checks
Before you start, here are some checks to ensure everything is set up correctly:
- BigQuery Access: Test your access by querying a table.
from google.cloud import bigquery
client = bigquery.Client()
query_job = client.query("SELECT SESSION_USER() as whoami")
result = query_job.result()
for row in result:
    print(row)
- GPU + Torch: Verify that your GPU is available.
import torch
torch.cuda.is_available()